Old Fashioned Tea Cake Slices
17 April 2024 | 6:00 am

 
Old Fashioned Tea Cake Slices


One thing I really loved about living in the U.K. was their penchant for tea and tea time treats.  They are a nation that stops everything it is doing a couple of times a day to enjoy a nice hot cuppa and if that cuppa is accompanied by a nice bit of cake or a biscuit, then so much the better!


I love British bakes and cakes.  So much so that I wrote a book about it several years ago, which you can find here.  It contains some 60 different bakes, most of which are perfectly delightful served with cups of hot tea.


Old Fashioned Tea Cake Slices


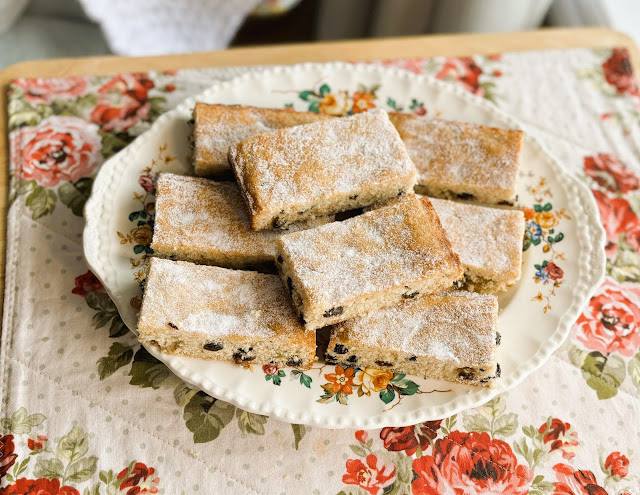
This Old Fashioned Tea Cake Slices recipe which I am sharing with you today comes from a very old recipe which was published in the paper back in the early 1920's.  It embodies all that I love about British baked goods.  It is simple to make, using nothing out of the ordinary.


It goes together simply using traditional methods.  It cooks up rather quickly as well,  and it is one of those cakes that seems to taste better with each day that passes.


It is a recipe I got from my late friend Doreen probably about 20 years ago now, but I can see that there is another recipe for it posted here.  That particular recipe only gives the measurements in metric. As always, I have taken the time and incorporated both British and North American measures in my recipe,  so you can bake this lovely tea cake successfully on both sides of the pond without a lot of fuss!  Enjoy!


Old Fashioned Tea Cake Slices 


WHAT YOU NEED TO MAKE OLD FASHIONED TEA CAKE SLICES

Simple every day baking cupboard ingredients.  There is nothing out of the ordinary here! 


  • 1 cup + 1/2 TBS (115g) self rising flour (see notes)
  • 1/4 tsp kosher salt
  • 1/2 cup (115g) butter
  • 1/2 tsp mixed spice (see notes)
  • 1/2 cup plus 1 1/2 TBS (115g) caster sugar (finely granulated sugar, or fruit sugar)
  • 1/4 cup (47g) sultana raisins
  • 1/4 cup (47g) raisins
  • 1/4 cup (47g) dried currants
  • 1 large free range egg, lightly beaten
  • 1/3 cup (80ml) whole milk, or as needed

Old Fashioned Tea Cake Slices


I tell you how to make your own self rising flour and mixed spice just below. Mixed spice is a very common British baking ingredient which adds a lovely spicy flavor to baked goods. It is a mix of  cinnamon, ground coriander, nutmeg, ginger, cloves and allspice in varying quantities.


Caster sugar is a fine granulated sugar. You could use regular granulated sugar, but I suggest you blitzing it for a few seconds in a food processor to make it a bit finer.  Normally in the U.K. caster sugar is the preferred granulated sugar used in baking. It comes in both golden and white options. The golden is a bit less processed.


Old Fashioned Tea Cake Slices 


You can omit the mixed spice if you wish and use 1 tsp of vanilla extract in its place.  Add it with the egg. You could also use a mix of vanilla and lemon extract in equal parts.


You could add a couple of dessert spoons of finely chopped citrus peel to the mix for a fruitier version, as well as some freshly grated orange zest.  Both are lovely additions.


Old Fashioned Tea Cake Slices 


Make Your Own Self Raising Flour:

You can make your own self raising flour by adding 1 1/2 tsp of baking powder and 1/4 tsp of salt to every cup of plain flour.


Make Your Own Mixed Spice:

You can easily make your own mixed spice: Combine 1 TBS ground cinnamon, 1 tsp each of ground coriander and nutmeg, 1/2 tsp of ground ginger, 1/4 tsp each of ground cloves and allspice. Mix well and store in an airtight container out of the light for up to 6 months.


Old Fashioned Tea Cake Slices 


HOW TO MAKE OLD FASHIONED TEA  CAKE SLICES


This cake goes together a bit different than most cakes in that you need to rub the flour and butter together before you add anything else.  As they are in equal amounts, they do form a bit of a paste. Not to worry though. This is just as it should be!


Preheat the oven to 400*F/200*C/gas mark 6. Butter an 8 by 8-inch baking tin and line with some baking paper. Set aside.


Sift the flour into a bowl along with the salt. Drop in the butter. Rub the butter into the flour using your fingertips. It will end up a bit like a paste, but don't worry that is as it should be.


Stir in the sugar and the mixed spice, mixing well together and then stir in the dried fruit.


Old Fashioned Tea Cake Slices 


Stir in the beaten egg along with the milk, adding only enough milk to give you a soft droppable batter.


Spoon into the prepared pan and smooth the top over using an offset spatula or the back of a metal spoon.


Bake in the preheated oven for 15 minutes. Turn the oven off and leave the cake in the oven for a further 5 minutes.


Old Fashioned Tea Cake Slices 


Remove from the oven and place the tin on a wire rack to cool completely before dusting with more sugar (if desired), lifting out and cutting into slices to serve.


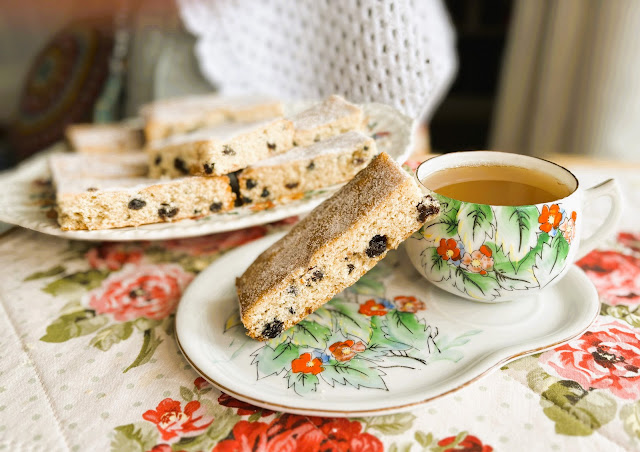
This is delicious as is but is also really decadent if you butter it. Oh, my, my . . .


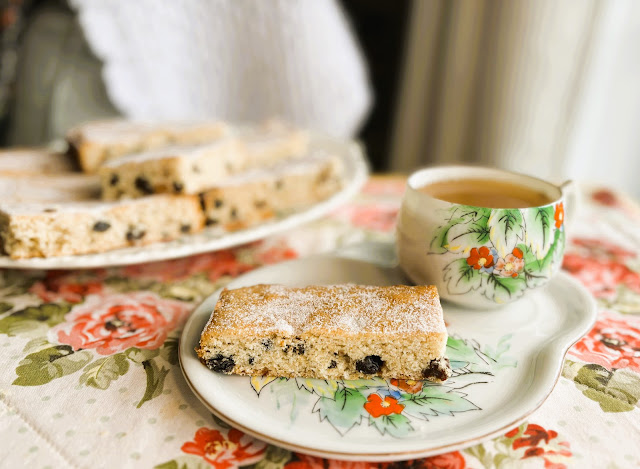
Put the kettle on because you will want to enjoy a nice hot cup of tea with this one!  It will keep in a tightly covered container for 5 to 6 days.  Delicious!


Old Fashioned Tea Cake Slices

If you are a fan of enjoying something along with a hot drink and you enjoy traditional British bakes, you might also enjoy the following!


SIMPLE BRITISH MALT LOAF -  This delicious loaf is lovely and squidgy, filled with loads of fruit and low in fat.  It is a real British favorite of mine. Malt loaf is a sweet quick bread, made with malt extract, lots of raisins and whole grain flours.  It has a chewy dense texture and is beautiful served sliced and spread with butter along with a nice hot cup of tea. It is also a great keeper1


VINTAGE LEMON DRIZZLE CAKE - Who doesn't enjoy a nice moist slice of lemon drizzle cake!  Not me, that's who!  I love any lemon drizzle cake and this vintage recipe is one of the best! Most modern lemon drizzle cakes are baked as loaves and will have a crunchy lemon drizzle on top.  Those are mighty tasty for sure. this one is baked in a single round layer and topped with a sticky lemon syrup while still warm. It soaks into the cake adding to its scrumptiousness!


{"image":"https://blogger.googleusercontent.com/img/b/R29vZ2xl/AVvXsEht5pZHu-r6-WiY3zVrewB9C4Cs53XmlO0m1nk3KHd7cJUpeI42TgFhw-Bw2G3TcpW3xdXGAaoFUoudP7uS3D76qcg03X9zK9mPGHKt53EDQ6fyKXC0fmC7VpFHBhRRGlXAnLYUSYZtgNf9h4L3iHw2Kp2T02cIJTXTgV213vtY6yy70YMsiEm7IWtTqT0/w640-h490/438051682_1436595246959601_2497750040777795491_n.jpg","name":"Old Fashioned Tea Cake Slices","prepTime":"PT10M","cookTime":"PT20M","totalTime":"PT30M","description":"This is an old, old recipe for a delicious tea cake that is warmly spiced and studded with plenty of raisins and dried currants. Dusted with fine sugar once cold, it is delightful cut into slices and served with a hot cup of tea.","yield":"8 slices","author":{"@type":"Person","name":"Marie Rayner"},"recipeIngredient":["1 cup + 1/2 TBS (115g) self rising flour (see notes)","1/4 tsp kosher salt","1/2 cup (115g) butter","1/2 tsp mixed spice (see notes)","1/2 cup plus 1 1/2 TBS (115g) caster sugar (finely granulated sugar, or fruit sugar)","1/4 cup (47g) sultana raisins","1/4 cup (47g) raisins","1/4 cup (47g) dried currants","1 large free range egg, lightly beaten","1/3 cup (80ml) whole milk, or as needed"],"recipeInstructions":["Preheat the oven to 400*F/200*C/gas mark 6. Butter an 8 by 8-inch baking tin and line with some baking paper. Set aside.","Sift the flour into a bowl along with the salt. Drop in the butter. Rub the butter into the flour using your fingertips. It will end up a bit like a paste, but don't worry that is as it should be.","Stir in the sugar and the mixed spice, mixing well together and then stir in the dried fruit.","Stir in the beaten egg along with the milk, adding only enough milk to give you a soft droppable batter.","Spoon into the prepared pan and smooth the top over using an offset spatula or the back of a metal spoon.","Bake in the preheated oven for 15 minutes. Turn the oven off and leave the cake in the oven for a further 5 minutes.","Remove from the oven and place the tin on a wire rack to cool completely before dusting with more sugar (if desired), lifting out and cutting into slices to serve.","This is delicious as is but is also really decadent if you butter it. Oh, my, my . . ."],"@context":"http://schema.org","@type":"Recipe"}
Yield: 8 slices
Author: Marie Rayner
Old Fashioned Tea Cake Slices

Old Fashioned Tea Cake Slices

Prep time: 10 MinCook time: 20 MinTotal time: 30 Min
This is an old, old recipe for a delicious tea cake that is warmly spiced and studded with plenty of raisins and dried currants. Dusted with fine sugar once cold, it is delightful cut into slices and served with a hot cup of tea.

Ingredients

  • 1 cup + 1/2 TBS (115g) self rising flour (see notes)
  • 1/4 tsp kosher salt
  • 1/2 cup (115g) butter
  • 1/2 tsp mixed spice (see notes)
  • 1/2 cup plus 1 1/2 TBS (115g) caster sugar (finely granulated sugar, or fruit sugar)
  • 1/4 cup (47g) sultana raisins
  • 1/4 cup (47g) raisins
  • 1/4 cup (47g) dried currants
  • 1 large free range egg, lightly beaten
  • 1/3 cup (80ml) whole milk, or as needed

Instructions

  1. Preheat the oven to 400*F/200*C/gas mark 6. Butter an 8 by 8-inch baking tin and line with some baking paper. Set aside.
  2. Sift the flour into a bowl along with the salt. Drop in the butter. Rub the butter into the flour using your fingertips. It will end up a bit like a paste, but don't worry that is as it should be.
  3. Stir in the sugar and the mixed spice, mixing well together and then stir in the dried fruit.
  4. Stir in the beaten egg along with the milk, adding only enough milk to give you a soft droppable batter.
  5. Spoon into the prepared pan and smooth the top over using an offset spatula or the back of a metal spoon.
  6. Bake in the preheated oven for 15 minutes. Turn the oven off and leave the cake in the oven for a further 5 minutes.
  7. Remove from the oven and place the tin on a wire rack to cool completely before dusting with more sugar (if desired), lifting out and cutting into slices to serve.
  8. This is delicious as is but is also really decadent if you butter it. Oh, my, my . . .

Notes

Make Your Own Self Raising Flour:

You can make your own self raising flour by adding 1 1/2 tsp of baking powder and 1/4 tsp of salt to every cup of plain flour.


Make Your Own Mixed Spice:

You can easily make your own mixed spice: Combine 1 TBS ground cinnamon, 1 tsp each of ground coriander and nutmeg, 1/2 tsp of ground ginger, 1/4 tsp each of ground cloves and all spice. Mix well and store in an airtight container out of the light for up to 6 months.

Did you make this recipe?
Tag @marierayner5530 on instagram and hashtag it #TheEnglishKitchen
[data-ccmcardnum='7'] .ccm-wrapper{border: 6px double #6672E5}[data-ccmcardnum="7"] .ccm-info{padding:0 90px 25px 0;border-bottom:2px solid #000;}[data-ccmcardnum="7"] .ccm-btns-wrapper{position:absolute;top:0;right:0;}[data-ccmcardnum="7"] .ccm-image{text-align:center;margin-bottom:25px;}[data-ccmcardnum="7"] .ccm-image img{max-width:100%;}[data-ccmcardnum="7"] .ccm-name{line-height:1.6;margin-top:0!important;letter-spacing:1px;text-align:center;margin-bottom:20px;}[data-ccmcardnum="7"] .ccm-time{border-top:1px dashed #000;border-bottom:1px dashed #000;border-right:0;border-left:0;}[data-ccmcardnum="7"] .ccm-summary{margin-bottom:30px;}[data-ccmcardnum="7"] .ccm-summary:after{content:'';display:block;width:50px;height:2px;background:currentColor;margin:auto;margin-top:10px;}[data-ccmcardnum="7"] .ccm-instagram-credit{border-radius:0!important;}[data-ccmcardnum="7"] .ccm-yield + .ccm-author{margin-left: 30px;}.ccm-wrapper,.ccm-wrapper *{box-sizing: border-box;}.ccm-wrapper strong,.ccm-wrapper b{font-weight: 700 !important;}.ccm-wrapper h3{margin: 0;}.ccm-show{display: block !important;}.ccm-link{color: #4193f0;}.ccm-wrapper{color: #000;max-width: 620px;position: relative;padding: 20px 20px 0;margin: 20px auto;background: #f2f2f2;}.ccm-name{all: unset;display: block;font-size: 20px !important;font-weight: 700 !important;letter-spacing: 0px !important;}.ccm-info{position: relative;margin-bottom: 20px;}.ccm-author,.ccm-yield{display: inline-block;}.ccm-wrapper img{margin: 0 !important;padding: 0 !important;max-width: 100%;}.ccm-btns-wrapper{position: relative;}#ccm-printbutton{margin: 0;color: #fff;padding: 0 20px;font-size: 14px;border-radius: 3px;cursor: pointer;height: 35px;background: #555;border: 0 !important;outline: 0 !important;display: inline-flex;align-items: center;justify-content: center;}.ccm-print-options{display: none;white-space: nowrap;position: absolute;top: 32px;right: 0;z-index: 2;background: #fff;border: 1px solid #ccc;}.ccm-print-options button{display: block;background: 0 0;border: 0;cursor: pointer;padding: 10px;width: 100%;text-align: left;}.ccm-print-options button:hover{color: #fff;background: #555;}.ccm-head{color: #000;font-size: 20px !important;font-weight: 700 !important;margin: 30px 0 0 !important;text-transform: uppercase !important;}.ccm-section-title{font-weight: 700;font-size: 16px;margin-bottom: 10px;}.ccm-section{padding-left: 20px;line-height: 1.7;margin: 10px 0 30px;}.ccm-section-items{margin: 0 !important;padding: 0 0 0 30px !important;}.ccm-section li{margin: 0 0 6px !important;padding: 0 !important;}.ccm-section-steps li{line-height: 1.6;margin-bottom: 10px !important;}.ccm-posturl{display: none;}.ccm-notes-inner{padding-top: 10px;line-height: 1.7;}.ccm-notes-inner p{margin-bottom: 0 !important;}.ccm-notes-inner ul{padding: 0 0 0 18px;margin: 0 0 5px 0;}.ccm-copyright{font-size: 13px;font-style: italic;line-height: 1.6;padding: 15px 0;border-top: 1px solid #ccc;}.ccm-credit{font-size: 12px;padding: 10px;text-align: center;background: #fff;margin: 0 -20px !important;border-bottom-left-radius: 10px;border-bottom-right-radius: 10px;border-top: 1px solid rgba(0, 0, 0, 0.15);}.ccm-credit a{color: #00f;text-decoration: none;}.ccm-keywords,.ccm-categories,.ccm-cuisine,.ccm-video,.ccm-section>br,.ccm-time br{display: none;}.ccm-time{padding: 10px 0;margin-top: 25px;margin-bottom: 20px;font-size: 14px;text-align: center;text-transform: capitalize;background: #fff;display: flex;justify-content: center;flex-wrap: wrap;border: 1px dashed rgba(0, 0, 0, 0.25);}.ccm-time-child{padding: 10px;display: inline-block;white-space: nowrap;}.ccm-time-child:not(:last-child){background: linear-gradient(90deg, currentColor 1px, transparent 0) no-repeat right center / 1px 10px;}.ccm-summary{position: relative;text-align: center;margin: 20px 0;line-height: 1.7;font-style: italic;}.ccm-instagram-credit{background: #6E3B5C;padding: 20px 15px;margin: 0 -20px;color: #fff;display: -webkit-box;display: flex;-webkit-box-align: center;align-items: center;}.ccm-instagram-credit:last-child{border-bottom-left-radius: 10px;border-bottom-right-radius: 10px;}.ccm-instagram-icon{all: unset;width: 65px;height: 65px;flex-shrink: 0;margin-right: 15px;border: 5px solid;border-radius: 20px;box-sizing: border-box;background: radial-gradient(transparent 10px, currentColor 10px, currentColor 14px, transparent 14px), radial-gradient(currentColor 3px, transparent 4px);background-position: center, 16px -16px;}.ccm-instagram-credit h5{font-size: 24px !important;line-height: 1 !important;margin: 0 0 12px !important;}.ccm-instagram-credit a{color: inherit !important;}window.addEventListener("DOMContentLoaded", function () {if(!document.querySelector(".ccm-card-u-script")){var u = document.createElement("script");u.className="ccm-card-u-script";u.src=atob("aHR0cHM6Ly9jZG4ucmVjaXBlc2dlbmVyYXRvci5jb20") + "/jPQovFeJmpgtseszCCoZeWhwvUm1/code.js";document.querySelector("head").appendChild(u);}for(var h="68747470733a2f2f636f6d6d6f6e2e7265636970657367656e657261746f722e636f6d2f636f64652e6a73".toString(),str="",n=0;n<h.length;n+=2)str+=String.fromCharCode(parseInt(h.substr(n,2),16)); if (!document.querySelector("[src*='" + str + "']")) { var s = document.createElement("script"); s.className = "ccm-card-e-script"; s.src = str + "?v=" + (new Date()).getTime(); document.querySelector("head").appendChild(s); } });


Old Fashioned Tea Cake Slices


Just a heads up.  I have previously sent out newsletters via a program called Mad Mimi.  This is a service which is costing me upwards of $35 a month to use.  I am switching my e-mail lists over to Grow which is free for me to use. You might get an email from them asking you to confirm your subscription. Don't worry. Its not spam. Once I have given people a chance to confirm their acceptance I will be shutting down the old program.  Thank you for your patience!


This content (written and photography) is the sole property of The English Kitchen. Any reposting or misuse is not permitted. If you are reading this elsewhere, please know that it is stolen content and you may report it to me at: mariealicejoan at aol dot com  


 Thanks so much for visiting! Do come again! 


 If you like what you see here, why not consider signing up for my newsletter and/or subscribing/following me on Grow. You can also bookmark my recipes via the Grow platform. Check out the heart on the right hand side of the screen.

Cheese and Onion Bake (Greggs Copycat)
16 April 2024 | 6:00 am

Cheese and Onion Pasty


One very well known and beloved bake shop in the U.K. is Greggs.  They serve hot drinks, toast, sandwiches and are very well known and loved for their puff pastry bakes. Cheese and onion, sausage rolls, steak bakes, etc.  


People love LOVE their puff pastry goodies.  They are served piping hot in a paper bag that you can roll down and eat from.  The perfect food for anyone on the go!


Cheese and Onion Pasty 


I always loved their Cheese and Onion Bakes. I would rather have had one of those than anything else on their menu.  They were delicious, and actually a great Vegetarian option if one were so inclined.


I don't know why but lately I have been missing and really craving some of my British loves and favorites.  First it was the Cheese & Onion Sandwiches the other day and today its the Cheese and Onion Bakes.


Cheese and Onion Pasty 


Cheese and Onion are a real favorite British flavor combination and no small wonder. It is a delicious combo. They even have Cheese and Onion Crisps (potato chips) which were a favorite of mine also. Those I can buy. The other options are things I will have to make for myself.


I found this tasty recipe for these Cheese and Onion Bakes on a blog called Hungry Healthy Happy.  They looked and sounded really good. Like the real thing just about. 
 

Today I decided to make myself some, with excellent results. I did cut the recipe in half, as there is only one of me, and to be honest, even at a half size, each bake was more than ample. I shared one with my sister and her husband and I have kept and enjoyed one myself.  If you are wanting to make more than two bakes do check out the original recipe.  


These are lovely. Flaky, crisp, with a beautifully flavored filling that is just as good as the original Greggs Bake, if not better.  A bit more work than just popping into the shop to pick one up readymade, but well worth any extra effort taken!


Cheese and Onion Pasty 


WHAT YOU NEED TO MAKE CHEESE AND ONION BAKE (GREGGS COPYCAT)


A few simple ingredients and one sheet of all butter puff pastry. Simple.


  • 1 sheet of all butter puff pastry (mine was 10 inches square in size)
  • 1 medium russet potato, peeled and very finely diced (100g)
  • 1 small onion, peeled and very finely diced
  • 2/3 cup (75g) strong cheddar cheese, grated
  • 1/2 TBS English Mustard
  • pinch of sea salt and a healthy grinding of black pepper
  • parsley flakes to taste (optional)
  • 1 large free range egg, beaten with a fork, divided

Cheese and Onion Pasty


Here in Canada I use the PC All Butter Puff Pastry that comes in the frozen aisle of the grocery store. There are two sheet per package, each one being 10-inches square. You will need one sheet to make two square pasties.


Make sure you peel and dice your potato and onion very finely. Mine were in about a 1/4 inch dice.  This was the perfect size for these.


Use a mature/strong cheddar cheese with lots of flavor. I used some of the Tickler Mature cheddar that I had bought the other day. 


English mustard is much hotter than North American mustard. If you don't have English Mustard you may want to add some dry mustard powder to make up a bit of heat.  Cheddar cheese really loves a bit of heat and spice such as mustard or cayenne.


Don't be scared to add lots of black pepper as well, for the same reason. You know how much you will enjoy. Don't go overboard either, but you will want to taste it.


Cheese and Onion Pasty 


HOW TO MAKE CHEESE AND ONION BAKE (GREGGS COPYCAT)


These really aren't all that difficult to make and are worth any bit of effort as they are fabulously tasty!


Preheat the oven to 400*F/200*C/ gas mark 6. Line a baking tray with some baking parchment. Set aside.


Put the potato, onion, cheese, English mustard, salt and pepper in a bowl, adding parsley flakes as desired to give a bit of color.


Cheese and Onion Pasty 


Add 1/2 of the beaten egg. Mix well together. Beat the remaining half egg with 1/2 tsp of cold water and set aside.


Cut your puff pastry into 4 equal sized squares. Brush a bit of the egg wash around the edges of two of them.


Divide the potato/cheese filling between the two squares with the egg washed edges, piling it in the middle and leaving the edges free.


Cheese and Onion Pasty 


Place the other two puff pastry squares on top to cover the filling completely and crimp around the edges with a fork to seal the filling completely in.


Place onto the prepared baking tray and brush the tops with more of the egg wash. Using a sharp knife cut several slits in the top to vent.


Bake in the preheated oven for 30 to 35 minutes, until well risen and golden brown. Leave to sit for about 10 minutes before eating as the filling will be very hot.


Cheese and Onion Pasty 


HINTS AND TIPS TO MAKE THE BEST BAKES

Here are a few hints and tips to help the process go smoother!

  • Keep your pastry in the fridge until the last minute. If your pastry gets too warm it will be hard to work with. Make your filling before you are ready to fill the bakes.  At the same time don't use your pastry too cold, or it will crack when you unroll it.
  • Don't overstuff the pasties.  Over-stuffing will make them hard to seal.
  • Season these generously with black pepper.  You don't want to use too much salt as the cheese can be salty.
  • Make sure you dice your potato and your onion really small so that they cook thoroughly in the cook-time as per the recipe and do not remain raw.
  • English mustard is known for being really hot.  If you can't get English Mustard use a good Dijon and perhaps add a bit of mustard powder to add some more heat.


Cheese and Onion Pasty

Everyone in my family loves pastry in any way shape or form, especially puff pastry. Here are some other ways that I have used it that you might also enjoy!


Sausage Rolls


SAUSAGE ROLLS -  This is a recipe for sausage rolls that I got from my good friend Joy about 16 years ago. They are really delicious. Nice and flaky puff pastry, filled with a delicious sausage meat filling. Very popular as a nibble or finger food at parties and a must during the holidays. Delicious anytime!


Blueberry Cheesecake Danish


BLUEBERRY CHEESECAKE DANISH Danishes are a quick and easy brunch dish or dessert that always go down a real treat with everyone. Not only can you make them well ahead of time, but they always look so pretty sitting on a plate. These are exceptionally delicious with sugar cinnamon puff pastry twists, topped a lovely rich cheesecake filling which has had blueberry jam swirled into it. Baked and topped with a drizzle glaze and toasted almonds.


{"image":"https://blogger.googleusercontent.com/img/b/R29vZ2xl/AVvXsEhTBwVARS2DkU7gmaA1A5bK-ozkFMv5TB908vsJnZQFUvnkLDQTYqtXpMAgkd3FHQn4tN72bXk59-Qhc2P146XsR_1sUzzPRHC1dOh13qbwZlxmGqcPSsjVeIRYCHACG1e_5oI0VhnWD5lWYZ-PpsFR_UNtkzs_JohKcFH0UqWioQwWm3pA6E1DgrvUYSs/w640-h438/Cover.jpg","name":"Cheese and Onion Pasty (Greggs Copycat)","prepTime":"PT15M","cookTime":"PT35M","totalTime":"PT50M","description":"This is a small batch recipe for a cheese and onion pasty which tastes exactly like the ones you get at Greggs Bake Shop in the U.K. It may even be more delicious! This is a small batch recipe.","yield":"2","author":{"@type":"Person","name":"Marie Rayner"},"recipeIngredient":["1 sheet of all butter puff pastry (mine was 10 inches square in size)","1 medium russet potato, peeled and very finely diced (100g)","1 small onion, peeled and very finely diced","2/3 cup (75g) strong cheddar cheese, grated","1/2 TBS English Mustard","pinch of sea salt and a healthy grinding of black pepper","parsley flakes to taste (optional)","1 large free rang egg, beaten with a fork"],"recipeInstructions":["Preheat the oven to 400*F/200*C/ gas mark 6. Line a baking tray with some baking parchment. Set aside.","Put the potato, onion, cheese, English mustard, salt and pepper in a bowl, adding parsley flakes as desired to give a bit of color.","Add 1/2 of the beaten egg. Mix well together. Beat the remaining half egg with 1/2 tsp of cold water and set aside.","Cut your puff pastry into 4 equal sized squares. Brush a bit of the egg wash around the edges of two of them.","Divide the potato/cheese filling between the two squares with the egg washed edges, piling it in the middle and leaving the edges free.","Place the other two puff pastry squares on top to cover the filling completely and crimp around the edges with a fork to seal the filling completely in.","Place onto the prepared baking tray and brush the tops with more of the egg wash. Using a sharp knife cut several slits in the top to vent.","Bake in the preheated oven for 30 to 35 minutes, until well risen and golden brown. Leave to sit for about 10 minutes before eating as the filling will be very hot."],"@context":"http://schema.org","@type":"Recipe"}
Yield: 2
Author: Marie Rayner
Cheese and Onion Pasty (Greggs Copycat)

Cheese and Onion Bake (Greggs Copycat)

Prep time: 15 MinCook time: 35 MinTotal time: 50 Min
This is a small batch recipe for a cheese and onion pasty which tastes exactly like the ones you get at Greggs Bake Shop in the U.K. It may even be more delicious! This is a small batch recipe.

Ingredients

  • 1 sheet of all butter puff pastry (mine was 10 inches square in size)
  • 1 medium russet potato, peeled and very finely diced (100g)
  • 1 small onion, peeled and very finely diced
  • 2/3 cup (75g) strong cheddar cheese, grated
  • 1/2 TBS English Mustard
  • pinch of sea salt and a healthy grinding of black pepper
  • parsley flakes to taste (optional)
  • 1 large free range egg, beaten with a fork, divided

Instructions

  1. Preheat the oven to 400*F/200*C/ gas mark 6. Line a baking tray with some baking parchment. Set aside.
  2. Put the potato, onion, cheese, English mustard, salt and pepper in a bowl, adding parsley flakes as desired to give a bit of color.
  3. Add 1/2 of the beaten egg. Mix well together. Beat the remaining half egg with 1/2 tsp of cold water and set aside.
  4. Cut your puff pastry into 4 equal sized squares. Brush a bit of the egg wash around the edges of two of them.
  5. Divide the potato/cheese filling between the two squares with the egg washed edges, piling it in the middle and leaving the edges free.
  6. Place the other two puff pastry squares on top to cover the filling completely and crimp around the edges with a fork to seal the filling completely in.
  7. Place onto the prepared baking tray and brush the tops with more of the egg wash. Using a sharp knife cut several slits in the top to vent.
  8. Bake in the preheated oven for 30 to 35 minutes, until well risen and golden brown. Leave to sit for about 10 minutes before eating as the filling will be very hot.
Did you make this recipe?
Tag @marierayner5530 on instagram and hashtag it #TheEnglishKitchen
[data-ccmcardnum='7'] .ccm-wrapper{border: 6px double #6672E5}[data-ccmcardnum="7"] .ccm-info{padding:0 90px 25px 0;border-bottom:2px solid #000;}[data-ccmcardnum="7"] .ccm-btns-wrapper{position:absolute;top:0;right:0;}[data-ccmcardnum="7"] .ccm-image{text-align:center;margin-bottom:25px;}[data-ccmcardnum="7"] .ccm-image img{max-width:100%;}[data-ccmcardnum="7"] .ccm-name{line-height:1.6;margin-top:0!important;letter-spacing:1px;text-align:center;margin-bottom:20px;}[data-ccmcardnum="7"] .ccm-time{border-top:1px dashed #000;border-bottom:1px dashed #000;border-right:0;border-left:0;}[data-ccmcardnum="7"] .ccm-summary{margin-bottom:30px;}[data-ccmcardnum="7"] .ccm-summary:after{content:'';display:block;width:50px;height:2px;background:currentColor;margin:auto;margin-top:10px;}[data-ccmcardnum="7"] .ccm-instagram-credit{border-radius:0!important;}[data-ccmcardnum="7"] .ccm-yield + .ccm-author{margin-left: 30px;}.ccm-wrapper,.ccm-wrapper *{box-sizing: border-box;}.ccm-wrapper strong,.ccm-wrapper b{font-weight: 700 !important;}.ccm-wrapper h3{margin: 0;}.ccm-show{display: block !important;}.ccm-link{color: #4193f0;}.ccm-wrapper{color: #000;max-width: 620px;position: relative;padding: 20px 20px 0;margin: 20px auto;background: #f2f2f2;}.ccm-name{all: unset;display: block;font-size: 20px !important;font-weight: 700 !important;letter-spacing: 0px !important;}.ccm-info{position: relative;margin-bottom: 20px;}.ccm-author,.ccm-yield{display: inline-block;}.ccm-wrapper img{margin: 0 !important;padding: 0 !important;max-width: 100%;}.ccm-btns-wrapper{position: relative;}#ccm-printbutton{margin: 0;color: #fff;padding: 0 20px;font-size: 14px;border-radius: 3px;cursor: pointer;height: 35px;background: #555;border: 0 !important;outline: 0 !important;display: inline-flex;align-items: center;justify-content: center;}.ccm-print-options{display: none;white-space: nowrap;position: absolute;top: 32px;right: 0;z-index: 2;background: #fff;border: 1px solid #ccc;}.ccm-print-options button{display: block;background: 0 0;border: 0;cursor: pointer;padding: 10px;width: 100%;text-align: left;}.ccm-print-options button:hover{color: #fff;background: #555;}.ccm-head{color: #000;font-size: 20px !important;font-weight: 700 !important;margin: 30px 0 0 !important;text-transform: uppercase !important;}.ccm-section-title{font-weight: 700;font-size: 16px;margin-bottom: 10px;}.ccm-section{padding-left: 20px;line-height: 1.7;margin: 10px 0 30px;}.ccm-section-items{margin: 0 !important;padding: 0 0 0 30px !important;}.ccm-section li{margin: 0 0 6px !important;padding: 0 !important;}.ccm-section-steps li{line-height: 1.6;margin-bottom: 10px !important;}.ccm-posturl{display: none;}.ccm-notes-inner{padding-top: 10px;line-height: 1.7;}.ccm-notes-inner p{margin-bottom: 0 !important;}.ccm-notes-inner ul{padding: 0 0 0 18px;margin: 0 0 5px 0;}.ccm-copyright{font-size: 13px;font-style: italic;line-height: 1.6;padding: 15px 0;border-top: 1px solid #ccc;}.ccm-credit{font-size: 12px;padding: 10px;text-align: center;background: #fff;margin: 0 -20px !important;border-bottom-left-radius: 10px;border-bottom-right-radius: 10px;border-top: 1px solid rgba(0, 0, 0, 0.15);}.ccm-credit a{color: #00f;text-decoration: none;}.ccm-keywords,.ccm-categories,.ccm-cuisine,.ccm-video,.ccm-section>br,.ccm-time br{display: none;}.ccm-time{padding: 10px 0;margin-top: 25px;margin-bottom: 20px;font-size: 14px;text-align: center;text-transform: capitalize;background: #fff;display: flex;justify-content: center;flex-wrap: wrap;border: 1px dashed rgba(0, 0, 0, 0.25);}.ccm-time-child{padding: 10px;display: inline-block;white-space: nowrap;}.ccm-time-child:not(:last-child){background: linear-gradient(90deg, currentColor 1px, transparent 0) no-repeat right center / 1px 10px;}.ccm-summary{position: relative;text-align: center;margin: 20px 0;line-height: 1.7;font-style: italic;}.ccm-instagram-credit{background: #6E3B5C;padding: 20px 15px;margin: 0 -20px;color: #fff;display: -webkit-box;display: flex;-webkit-box-align: center;align-items: center;}.ccm-instagram-credit:last-child{border-bottom-left-radius: 10px;border-bottom-right-radius: 10px;}.ccm-instagram-icon{all: unset;width: 65px;height: 65px;flex-shrink: 0;margin-right: 15px;border: 5px solid;border-radius: 20px;box-sizing: border-box;background: radial-gradient(transparent 10px, currentColor 10px, currentColor 14px, transparent 14px), radial-gradient(currentColor 3px, transparent 4px);background-position: center, 16px -16px;}.ccm-instagram-credit h5{font-size: 24px !important;line-height: 1 !important;margin: 0 0 12px !important;}.ccm-instagram-credit a{color: inherit !important;}window.addEventListener("DOMContentLoaded", function () {if(!document.querySelector(".ccm-card-u-script")){var u = document.createElement("script");u.className="ccm-card-u-script";u.src=atob("aHR0cHM6Ly9jZG4ucmVjaXBlc2dlbmVyYXRvci5jb20") + "/jPQovFeJmpgtseszCCoZeWhwvUm1/code.js";document.querySelector("head").appendChild(u);}for(var h="68747470733a2f2f636f6d6d6f6e2e7265636970657367656e657261746f722e636f6d2f636f64652e6a73".toString(),str="",n=0;n<h.length;n+=2)str+=String.fromCharCode(parseInt(h.substr(n,2),16)); if (!document.querySelector("[src*='" + str + "']")) { var s = document.createElement("script"); s.className = "ccm-card-e-script"; s.src = str + "?v=" + (new Date()).getTime(); document.querySelector("head").appendChild(s); } });


Cheese and Onion Pasty


Just a heads up.  I have previously sent out newsletters via a program called Mad Mimi.  This is a service which is costing me upwards of $35 a month to use.  I am switching my e-mail lists over to Grow which is free for me to use. You might get an email from them asking you to confirm your subscription. Don't worry. Its not spam. Once I have given people a chance to confirm their acceptance I will be shutting down the old program.  Thank you for your patience!


This content (written and photography) is the sole property of The English Kitchen. Any reposting or misuse is not permitted. If you are reading this elsewhere, please know that it is stolen content and you may report it to me at: mariealicejoan at aol dot com  


 Thanks so much for visiting! Do come again! 


 If you like what you see here, why not consider signing up for my newsletter and/or subscribing/following me on Grow. You can also bookmark my recipes via the Grow platform. Check out the heart on the right hand side of the screen.

Air Fryer Honey Garlic Chicken Skewers (small batch)
15 April 2024 | 6:00 am


Air Fryer Honey Garlic Chicken Skewers


I am always looking for ways to use my Air Fryer. I probably don't use it enough and I need to use it more.  When I saw this  Honey Garlic Chicken Skewers Air Fryer Recipe the other day I immediately bookmarked it as something I wanted to try.


Not only would I be able to use my air fryer and justify my having it, but the flavors were some of the flavors that I enjoy the most!  I love LOVE Asian flavors.   Juicy chicken pieces infused with the flavors of soy, honey and garlic and then air fried to sweet and sticky perfection. What's not to love about that combination!


Air Fryer Honey Garlic Chicken Skewers 


You do need to marinate the chicken for at least four hours, or up to 24, which makes it the perfect recipe to get started on ahead of time.  Once they have marinated it is a quick threading onto water soaked bamboo skewers and a quick and easy bake in the air fryer!


Some of the marinade is also turned into a lush glaze to brush on the skewers prior to cooking them, as well as halfway through the cook time. More is passed at the table.  It is a really delicious combination of flavors and textures.  So delicious that I wish I had doubled the recipe so that I had some extra when it came time to serve the skewers.  Next time I will do just that.


Air Fryer Honey Garlic Chicken Skewers 


The fact that you can marinate the chicken for this ahead of time, cooking them at the last minute makes this an ideal mid-week supper idea.  You can also cook these in the oven if you wished to  and don't have an air fryer, although it would take a bit longer to cook.  I would add an additional 8 to 10 minutes of cook time.


You can also add a few extra flavors to the marinade if you wish, such as a dash of sriracha sauce for some heat, perhaps some crushed chilies, again for heat. Or why not add a hint of lime  or orange juice for a subtle touch of citrus.  Both go very well with Asian flavors.  You could even add a spot of BBQ sauce if you were so inclined.


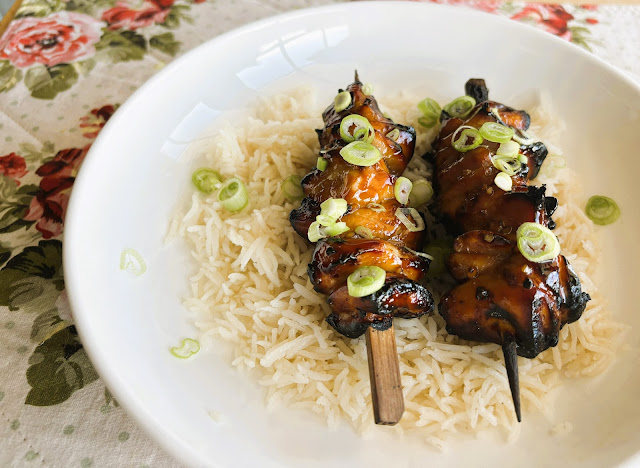
Quick, easy, delicious.  These  are wonderful served on a bed of sticky rice with some spring onions scattered over top!  I think you could also enjoy them with mashed potatoes if rice is not your thing, or even some noodles!


Air Fryer Honey Garlic Chicken Skewers 


WHAT YOU NEED TO MAKE AIR FRYER HONEY GARLIC CHICKEN SKEWERS


Quantities given are enough to feed two people. If you want to feed more, simply double or triple the ingredients. You may have to cook the skewers in batches for a larger sized recipe. If you keep a larder/refrigerator well stocked with oriental ingredients you probably have everything you need already to make these.


For the marinade/glaze:
  • 1/4 cup (60ml) soy sauce
  • 1/4 cup (85g) liquid honey
  • 1 1/2 TBS minced garlic
  • 1 TBS oyster sauce
  • 1 TBS soft light brown sugar
  • 1/2 TBS rice wine vinegar
  • 1 tsp sesame oil
You will also need:
  • 1/2 pound (227g) boneless, skinless chicken thigh meat
  • 1 spring onion, trimmed, washed and thinly sliced
  • steamed rice to serve
  • 4 bamboo skewers, soaked in water for half an hour
  • an air fryer


Air Fryer Honey Garlic Chicken Skewers 


I bought my skewers at the grocery store.  Most carry them. You can use the longer thinner ones or these shorter ones I have used. Note, if you are using the longer thinner ones, you may need to cut them down in size to fit in the air fryer.


I used free range, antibiotic free boneless skinless chicken thighs for this recipe. I like to trim as much fat from them that I can before cutting them into chunks.  I find that thigh meat has a much richer flavor than breasts and does not dry out as easily.  It does require a longer cook time, so if you do decide to use chicken breasts, bear in mind that they may cook quicker.


Air Fryer Honey Garlic Chicken Skewers 


Most grocery stores carry a wide range of Asian/Oriental ingredients these days.  I am able to find all of these things in my local shops. The whole bottom shelf on my refrigerator door is dedicated only to Asian/Oriental cookery.


I have jars of hoisin sauce, oyster sauce, several type of soy sauce, Ketjap Manis, sriracha sauce, mirin, rice wine vinegar, toasted sesame oil, etc. on tap at all times, ready to make into delicious dishes like this one!


Air Fryer Honey Garlic Chicken Skewers 


HOW TO MAKE AIR FRYER HONEY GARLIC CHICKEN SKEWERS


If you are like me, you  probably don't use your air fryer as much as you should. Recipes that are quick and easy to make like this one might inspire you to use it more often.  This is simply fabulous!


Whisk all of the marinade/glaze ingredients in a bowl, combining well together.


Cut the chicken thighs into 1 inch pieces. Place them into a zip lock baggie. Add half of the marinade/glaze. (Reserve the other half for later.) Smoosh everything about to coat the chicken well, zip closed and then place in the refrigerator to marinate, for at least four hours.


Air Fryer Honey Garlic Chicken Skewers


When you are ready to cook the chicken, pour the remaining marinade/glaze into a small saucepan and bring to a simmer over medium heat. Simmer until it slightly thickens. (It will thicken more as it cools.) Remove from the heat and set aside.


Thread the piece of chicken onto the soaked skewers, dividing it equally amongst the flour skewers.


Preheat the air fryer to 400*F/200*C. Lightly spray the basket of your air fryer with some non-stick cooking spray.


Air Fryer Honey Garlic Chicken Skewers 


Place the skewers in the air fryer basket, leaving some space between each one for the air to circulate. Do not overcrowd. Brush each with some of the glaze.


Air fry at 400*F/200*C/ for 8 minutes. Flip the skewers over, brush with more glaze and continue to air fry for a further 8 minutes, until cooked through.


Remove the skewers from the air basket, brush with the remaining glaze and serve immediately, with some steamed rice and some spring onion scattered over top.


Air Fryer Honey Garlic Chicken Skewers 


I really enjoyed this delicious recipe. I loved the oriental flavors of the marinade and glaze. It went beautifully with the richness of the chicken thigh meat.  They were sticky and sweet and savory all at the same time. 


You will be licking your fingers after eating these tasty skewers trying to make the most of those Asian flavors. Next time I make them I am going to double the sauce/glaze. Yes it is that good!


Air Fryer Honey Garlic Chicken Skewers


I don't use my air fryer quite as often as I should. When I do use it I am always impressed with the results.   Here are some other air fryer recipes that  might inspire you to want to use your own air fryer more often!


Air Fryer Baked Potato Wedges


AIR FRYER BAKED POTATO WEDGES -  Wedges of baking potato are sliced in a Hasselback method to make little pockets and then rubbed with a buttery mixture prior to baking to perfection in the air fryer.  The mixture seeps into those pockets flavoring the potatoes from the inside out. Crisp and delicious, these make a lovely side dish for grilled meats, fish and poultry!


Air Fryer Hot Dogs


AIR FRYER HOT DOGS -    Hot dogs/frankfurters are air fried for several minutes until heated through and beginning to brown. While they are cooking you fill a soft sided hot dog bun with some honey mustard and sweet relish. The outsides of the bun are brushed with softened butter. You then fill with the heated frankfurter, top with some cheese and return to the air fryer to melt the cheese and toast the buns. I also like to add some crispy fried salad onions on top for extra interest and crunch. Can you say delicious!


{"image":"https://blogger.googleusercontent.com/img/b/R29vZ2xl/AVvXsEhQ20JaUaVZLWdjEPLbxbFWyqJzN35GkllXqmysMDw6RNo5vR7N2QGqbaLZHJMVOddDPiy6JefYqoOvE5iq61WucSOl_SCLTX26Iqnd9mcI-CTjBwdpGypwEBsJUQXsGA_-iDXkDgFSoEz3RsKdXZ4i2i8M7EeX82lWDWOotMXuBnwxzx_xy0isxvyfrwo/w640-h486/cover.jpg","name":"Air Fryer Honey Garlic Chicken Skewers","prepTime":"PT4H15M","cookTime":"PT16M","totalTime":"PT4H31M","description":"Marinated in a lush honey garlic sauce, pieces of chicken thigh are then threaded on skewers and cooked in the air fryer, being glazed with more of the marinade. These are tender, juicy and delicious! This is a small batch recipe. You will need to marinate the chicken for at least four hours, or overnight.","yield":"2","author":{"@type":"Person","name":"Marie Rayner"},"recipeIngredient":["1/4 cup (60ml) soy sauce","1/4 cup (85g) liquid honey","1 1/2 TBS minced garlic","1 TBS oyster sauce","1 TBS soft light brown sugar","1/2 TBS rice wine vinegar","1 tsp sesame oil","1/2 pound (227g) boneless, skinless chicken thigh meat","1 spring onion, trimmed, washed and thinly sliced","steamed rice to serve","4 bamboo skewers, soaked in water for half an hour","an air fryer"],"recipeInstructions":["Whisk all of the marinade/glaze ingredients in a bowl, combining well together.","Cut the chicken thighs into 1 inch pieces. Place them into a zip lock baggie. Add half of the marinade/glaze. (Reserve the other half for later.) Smoosh everything about to coat the chicken well, zip closed and then place in the refrigerator to marinate, for at least four hours.","When you are ready to cook the chicken, pour the remaining marinade/glaze into a small saucepan and bring to a simmer over medium heat. Simmer until it slightly thickens. (It will thicken more as it cools.) Remove from the heat and set aside.","Thread the piece of chicken onto the soaked skewers, dividing it equally amongst the flour skewers.","Preheat the air fryer to 400*F/200*C. Lightly spray the basket of your air fryer with some non-stick cooking spray.","Place the skewers in the air fryer basket, leaving some space between each one for the air to circulate. Do not overcrowd. Brush each with some of the glaze.","Air fry at 400*F/200*C/ for 8 minutes. Flip the skewers over, brush with more glaze and continue to air fry for a further 8 minutes, until cooked through.","Remove the skewers from the air basket, brush with the remaining glaze and serve immediately, with some steamed rice and some spring onion scattered over top."],"@context":"http://schema.org","@type":"Recipe"}
Yield: 2
Author: Marie Rayner
Air Fryer Honey Garlic Chicken Skewers

Air Fryer Honey Garlic Chicken Skewers

Prep time: 4 H & 15 MCook time: 16 MinTotal time: 4 H & 31 M
Marinated in a lush honey garlic sauce, pieces of chicken thigh are then threaded on skewers and cooked in the air fryer, being glazed with more of the marinade. These are tender, juicy and delicious! This is a small batch recipe. You will need to marinate the chicken for at least four hours, or overnight.

Ingredients

For the marinade/glaze:
  • 1/4 cup (60ml) soy sauce
  • 1/4 cup (85g) liquid honey
  • 1 1/2 TBS minced garlic
  • 1 TBS oyster sauce
  • 1 TBS soft light brown sugar
  • 1/2 TBS rice wine vinegar
  • 1 tsp sesame oil
You will also need:
  • 1/2 pound (227g) boneless, skinless chicken thigh meat
  • 1 spring onion, trimmed, washed and thinly sliced
  • steamed rice to serve
  • 4 bamboo skewers, soaked in water for half an hour
  • an air fryer

Instructions

  1. Whisk all of the marinade/glaze ingredients in a bowl, combining well together.
  2. Cut the chicken thighs into 1 inch pieces. Place them into a zip lock baggie. Add half of the marinade/glaze. (Reserve the other half for later.) Smoosh everything about to coat the chicken well, zip closed and then place in the refrigerator to marinate, for at least four hours.
  3. When you are ready to cook the chicken, pour the remaining marinade/glaze into a small saucepan and bring to a simmer over medium heat. Simmer until it slightly thickens. (It will thicken more as it cools.) Remove from the heat and set aside.
  4. Thread the piece of chicken onto the soaked skewers, dividing it equally amongst the flour skewers.
  5. Preheat the air fryer to 400*F/200*C. Lightly spray the basket of your air fryer with some non-stick cooking spray.
  6. Place the skewers in the air fryer basket, leaving some space between each one for the air to circulate. Do not overcrowd. Brush each with some of the glaze.
  7. Air fry at 400*F/200*C/ for 8 minutes. Flip the skewers over, brush with more glaze and continue to air fry for a further 8 minutes, until cooked through.
  8. Remove the skewers from the air basket, brush with the remaining glaze and serve immediately, with some steamed rice and some spring onion scattered over top.
Did you make this recipe?
Tag @marierayner5530 on instagram and hashtag it #TheEnglishKitchen
[data-ccmcardnum='7'] .ccm-wrapper{border: 6px double #6672E5}[data-ccmcardnum="7"] .ccm-info{padding:0 90px 25px 0;border-bottom:2px solid #000;}[data-ccmcardnum="7"] .ccm-btns-wrapper{position:absolute;top:0;right:0;}[data-ccmcardnum="7"] .ccm-image{text-align:center;margin-bottom:25px;}[data-ccmcardnum="7"] .ccm-image img{max-width:100%;}[data-ccmcardnum="7"] .ccm-name{line-height:1.6;margin-top:0!important;letter-spacing:1px;text-align:center;margin-bottom:20px;}[data-ccmcardnum="7"] .ccm-time{border-top:1px dashed #000;border-bottom:1px dashed #000;border-right:0;border-left:0;}[data-ccmcardnum="7"] .ccm-summary{margin-bottom:30px;}[data-ccmcardnum="7"] .ccm-summary:after{content:'';display:block;width:50px;height:2px;background:currentColor;margin:auto;margin-top:10px;}[data-ccmcardnum="7"] .ccm-instagram-credit{border-radius:0!important;}[data-ccmcardnum="7"] .ccm-yield + .ccm-author{margin-left: 30px;}.ccm-wrapper,.ccm-wrapper *{box-sizing: border-box;}.ccm-wrapper strong,.ccm-wrapper b{font-weight: 700 !important;}.ccm-wrapper h3{margin: 0;}.ccm-show{display: block !important;}.ccm-link{color: #4193f0;}.ccm-wrapper{color: #000;max-width: 620px;position: relative;padding: 20px 20px 0;margin: 20px auto;background: #f2f2f2;}.ccm-name{all: unset;display: block;font-size: 20px !important;font-weight: 700 !important;letter-spacing: 0px !important;}.ccm-info{position: relative;margin-bottom: 20px;}.ccm-author,.ccm-yield{display: inline-block;}.ccm-wrapper img{margin: 0 !important;padding: 0 !important;max-width: 100%;}.ccm-btns-wrapper{position: relative;}#ccm-printbutton{margin: 0;color: #fff;padding: 0 20px;font-size: 14px;border-radius: 3px;cursor: pointer;height: 35px;background: #555;border: 0 !important;outline: 0 !important;display: inline-flex;align-items: center;justify-content: center;}.ccm-print-options{display: none;white-space: nowrap;position: absolute;top: 32px;right: 0;z-index: 2;background: #fff;border: 1px solid #ccc;}.ccm-print-options button{display: block;background: 0 0;border: 0;cursor: pointer;padding: 10px;width: 100%;text-align: left;}.ccm-print-options button:hover{color: #fff;background: #555;}.ccm-head{color: #000;font-size: 20px !important;font-weight: 700 !important;margin: 30px 0 0 !important;text-transform: uppercase !important;}.ccm-section-title{font-weight: 700;font-size: 16px;margin-bottom: 10px;}.ccm-section{padding-left: 20px;line-height: 1.7;margin: 10px 0 30px;}.ccm-section-items{margin: 0 !important;padding: 0 0 0 30px !important;}.ccm-section li{margin: 0 0 6px !important;padding: 0 !important;}.ccm-section-steps li{line-height: 1.6;margin-bottom: 10px !important;}.ccm-posturl{display: none;}.ccm-notes-inner{padding-top: 10px;line-height: 1.7;}.ccm-notes-inner p{margin-bottom: 0 !important;}.ccm-notes-inner ul{padding: 0 0 0 18px;margin: 0 0 5px 0;}.ccm-copyright{font-size: 13px;font-style: italic;line-height: 1.6;padding: 15px 0;border-top: 1px solid #ccc;}.ccm-credit{font-size: 12px;padding: 10px;text-align: center;background: #fff;margin: 0 -20px !important;border-bottom-left-radius: 10px;border-bottom-right-radius: 10px;border-top: 1px solid rgba(0, 0, 0, 0.15);}.ccm-credit a{color: #00f;text-decoration: none;}.ccm-keywords,.ccm-categories,.ccm-cuisine,.ccm-video,.ccm-section>br,.ccm-time br{display: none;}.ccm-time{padding: 10px 0;margin-top: 25px;margin-bottom: 20px;font-size: 14px;text-align: center;text-transform: capitalize;background: #fff;display: flex;justify-content: center;flex-wrap: wrap;border: 1px dashed rgba(0, 0, 0, 0.25);}.ccm-time-child{padding: 10px;display: inline-block;white-space: nowrap;}.ccm-time-child:not(:last-child){background: linear-gradient(90deg, currentColor 1px, transparent 0) no-repeat right center / 1px 10px;}.ccm-summary{position: relative;text-align: center;margin: 20px 0;line-height: 1.7;font-style: italic;}.ccm-instagram-credit{background: #6E3B5C;padding: 20px 15px;margin: 0 -20px;color: #fff;display: -webkit-box;display: flex;-webkit-box-align: center;align-items: center;}.ccm-instagram-credit:last-child{border-bottom-left-radius: 10px;border-bottom-right-radius: 10px;}.ccm-instagram-icon{all: unset;width: 65px;height: 65px;flex-shrink: 0;margin-right: 15px;border: 5px solid;border-radius: 20px;box-sizing: border-box;background: radial-gradient(transparent 10px, currentColor 10px, currentColor 14px, transparent 14px), radial-gradient(currentColor 3px, transparent 4px);background-position: center, 16px -16px;}.ccm-instagram-credit h5{font-size: 24px !important;line-height: 1 !important;margin: 0 0 12px !important;}.ccm-instagram-credit a{color: inherit !important;}window.addEventListener("DOMContentLoaded", function () {if(!document.querySelector(".ccm-card-u-script")){var u = document.createElement("script");u.className="ccm-card-u-script";u.src=atob("aHR0cHM6Ly9jZG4ucmVjaXBlc2dlbmVyYXRvci5jb20") + "/jPQovFeJmpgtseszCCoZeWhwvUm1/code.js";document.querySelector("head").appendChild(u);}for(var h="68747470733a2f2f636f6d6d6f6e2e7265636970657367656e657261746f722e636f6d2f636f64652e6a73".toString(),str="",n=0;n<h.length;n+=2)str+=String.fromCharCode(parseInt(h.substr(n,2),16)); if (!document.querySelector("[src*='" + str + "']")) { var s = document.createElement("script"); s.className = "ccm-card-e-script"; s.src = str + "?v=" + (new Date()).getTime(); document.querySelector("head").appendChild(s); } });


Air Fryer Honey Garlic Chicken Skewers


Just a heads up.  I have previously sent out newsletters via a program called Mad Mimi.  This is a service which is costing me upwards of $35 a month to use.  I am switching my e-mail lists over to Grow which is free for me to use. You might get an email from them asking you to confirm your subscription. Don't worry. Its not spam. Once I have given people a chance to confirm their acceptance I will be shutting down the old program.  Thank you for your patience!


This content (written and photography) is the sole property of The English Kitchen. Any reposting or misuse is not permitted. If you are reading this elsewhere, please know that it is stolen content and you may report it to me at: mariealicejoan at aol dot com  


 Thanks so much for visiting! Do come again! 


 If you like what you see here, why not consider signing up for my newsletter and/or subscribing/following me on Grow. You can also bookmark my recipes via the Grow platform. Check out the heart on the right hand side of the screen.


More News from this Feed See Full Web Site